
In these digital days, a family ends up with so much digital stuff that you need the equivalent of a junk room to put it all in. That’s what a NAS is for us. Unfortunately, half of that junk was unceremoniously wiped out the other day and I wanted to get it back.
This is what I found:
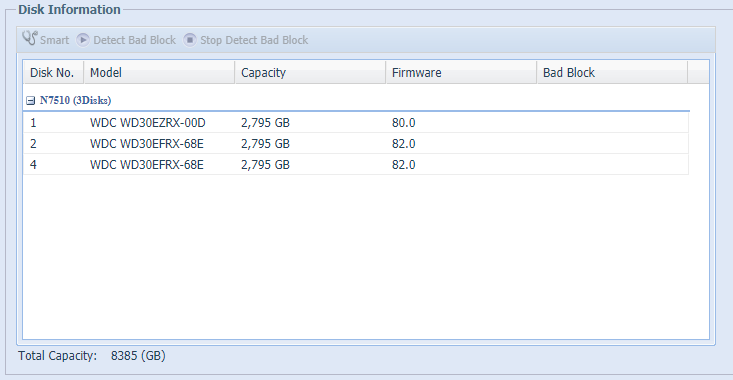
My NAS is a Thecus N7510 which has 7 drive bays and is essentially a small Linux server. When I first bought it I had enough money for 2 disks, so set them up as a RAID 1 array, which is full mirroring. It means that if either of them went down I would have a full copy. I later added two more disks which I had to add as a second RAID 1 array.
One unfortunate evening, one of the disks of the second RAID simply failed. I wasn’t too bothered because the other disk had everything on it. However, I made the mistake of not immediately replacing it.
Because soon after, the other disk disappeared from the NAS. Argh! It’s all gone! Well, I reseated the disk in the bay and it reappeared in the disk section.
But the RAID was gone.
So, that’s the background. Now, how did I get my stuff back?
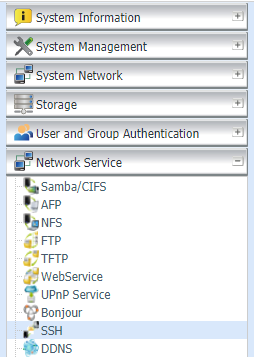
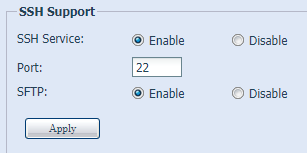
First thing to do is to log in to the administration console of the NAS and enable SSH.
Log in and you should be able to check the status of your RAID by using the following command:
N7510:~# cat /proc/mdstat
Personalities : [linear] [raid0] [raid1] [raid10] [raid6] [raid5] [raid4] [multipath]
md0 : active raid1 sda2[0] sdb2[2]
      2927622144 blocks super 1.2 [2/2] [UU]

md50 : active raid1 sda3[0] sdb3[2]
      524276 blocks super 1.2 [2/2] [UU]

md10 : active raid1 sdd1[8] sda1[0] sdb1[7]
      2096116 blocks super 1.2 [7/3] [UUU____]
It took me a while to work out what this was telling me.
Thecus create 3 partitions on each disk and mount them all separately as
distinct RAID arrays. The first (/dev/md0) is a ~2Tb data RAID using ext4,
the second (/dev/md50) is a some sort of journal RAID using xfs that’s about
500Mb, and the last (/dev/md10) is a 2Gb swap RAID.
I found this out with the command blkid:
N7510:~# blkid
/dev/loop0: UUID="17d1b7d5-b347-426e-9fee-9d1c8c693204" TYPE="ext2"
<snip>
/dev/sda1: UUID="8396418c-655c-d142-e68e-1db3c80fafc6" LABEL="N7510:10" TYPE="linux_raid_member"
/dev/sda2: UUID="f79815f8-9e26-e03d-2041-6d7e2c966b36" LABEL="N7510:0" TYPE="linux_raid_member"
/dev/sda3: UUID="f109303f-b40c-81a8-2c59-c90d5b8e741d" LABEL="N7510:50" TYPE="linux_raid_member"
/dev/sdb1: UUID="8396418c-655c-d142-e68e-1db3c80fafc6" LABEL="N7510:10" TYPE="linux_raid_member"
/dev/sdb2: UUID="f79815f8-9e26-e03d-2041-6d7e2c966b36" LABEL="N7510:0" TYPE="linux_raid_member"
/dev/sdb3: UUID="f109303f-b40c-81a8-2c59-c90d5b8e741d" LABEL="N7510:50" TYPE="linux_raid_member"
/dev/sdd1: UUID="8396418c-655c-d142-e68e-1db3c80fafc6" LABEL="N7510:10" TYPE="linux_raid_member"
/dev/md10: UUID="54580164-0aae-41a8-b7ed-6f02210a593a" TYPE="swap"
/dev/md50: UUID="561ed2f2-2833-4088-931d-6f0dcc2514b7" TYPE="xfs"
/dev/md0: UUID="a55e7060-94fb-4a96-9b6d-025865903c12" TYPE="ext4"
The last three lines show us that. The individual disk devices also show up there,
and you can see /dev/sda*, /dev/sdb*, and /dev/sdd* all listed as type
“linux_raid_member”. This is different type of filesystem called GPT and
must be used as part of a RAID (you can’t mount these directly).
So, the good news is that we can see one of the partitions from the missing
RAID (/dev/sdd1). But only one.
The tool mdadm is used to administer RAID arrays, and you can use the
flag -E to examine a disk and its partition. Let’s look at that partition:
N7510:~# mdadm -E /dev/sdd1
/dev/sdd1:
          Magic : a92b4efc
        Version : 1.2
    Feature Map : 0x0
     Array UUID : 8396418c:655cd142:e68e1db3:c80fafc6
           Name : N7510:10  (local to host N7510)
  Creation Time : Thu Oct  2 19:43:15 2014
     Raid Level : raid1
   Raid Devices : 7

 Avail Dev Size : 4192256 (2047.34 MiB 2146.44 MB)
     Array Size : 4192232 (2047.33 MiB 2146.42 MB)
  Used Dev Size : 4192232 (2047.33 MiB 2146.42 MB)
...
The last bits here show that it’s about 2Gb. That means this is the swap partition (in fact, during my playing I was able to assemble this single partition to a RAID array and see that it was a swap partition).
So where are the other partitions? Looking at /proc/partitions shows that
they are there:
N7510:~# cat /proc/partitions
major minor  #blocks  name
<snip>
   8       48 2930266584 sdd
   8       49    2097152 sdd1
   8       50 2927623168 sdd2
   8       51     524288 sdd3
I’m glad to see that 2Tb partition is there! Let’s have a look at it.
N7510:~# mdadm -E /dev/sdd2
/dev/sdd2:
mdadm: No md superblock detected on /dev/sdd2.
Uh oh. That doesn’t sound good. A bit of searching and I think this means the data in the header on the disk is corrupt. But, from what I can tell, the files are still there.
I spent a long time researching and eventually came across a post that
suggested using mdadm --create to create the RAID again. I didn’t like
the sound of this and resisted for a loooong time (one of the main reasons
I’m writing this post is in the hope it might stop someone else searching
for many hours, like I did).
But, it turns out that mdadm is a clever tool, and if there is already data
in the array it will keep it. So, to recreate the headers on those partitions
you simply recreate the RAIDs with mdadm using the single disk (telling it the
second disk is missing):
N7510:~# mdadm --create /dev/md1 --verbose --level=1 --raid-devices=2 /dev/sdd2 missing
mdadm: Note: this array has metadata at the start and
    may not be suitable as a boot device.  If you plan to
    store '/boot' on this device please ensure that
    your boot-loader understands md/v1.x metadata, or use
    --metadata=0.90
mdadm: size set to 2927622008K
Continue creating array? y
mdadm: Defaulting to version 1.2 metadata
mdadm: array /dev/md1 started.
Answering yes to Continue creating array? was pretty scary. Was this the end of my data?
Well, no actually. But first, the Thecus N7510 began a constant beep - it makes your head spin.
While it was beeping I mounted to a temporary directory and could see my files!!
N7510:~# mkdir tmp
N7510:~# mount /dev/md1 tmp
N7510:~# ls
data/       lost+found/ sys@
Ok, I’m guessing the NAS was moaning because I had not mounted the swap and journal partitions. So I did that too:
N7510:~# mdadm --assemble --run /dev/md51 /dev/sdd1
mdadm: /dev/md51 has been started with 1 drive (out of 7).

N7510:~# mdadm --create /dev/md11 --verbose --level=1 --raid-devices=2 /dev/sdd3 missing
mdadm: Note: this array has metadata at the start and
    may not be suitable as a boot device.  If you plan to
    store '/boot' on this device please ensure that
    your boot-loader understands md/v1.x metadata, or use
    --metadata=0.90
mdadm: size set to 524276K
Continue creating array? y
mdadm: Defaulting to version 1.2 metadata
mdadm: array /dev/md11 started.
(note I didn’t --create the swap partition as it was still intact, so
I simply --assemble it)
The NAS didn’t stop moaning (drilling a hole in my head with its incessant beep) even though it had all the arrays now. So, I rebooted with fingers firmly crossed.
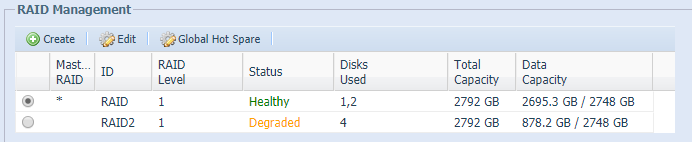
To my surprise it worked! The RAID reappeared in the Thecus UI (admittedly, degraded as there’s only one disk in the RAID):
I remounted the nVideo Shield so the Plex server could see the NAS and I was able to watch some of the video I had stored on there.
So, at least temporarily fixed until I can get a new disk to replace the broken one.
My intention for posting this is to try to save someone else the long hours of searching the web and finding not quite the right answers. Plenty of people far more knowledgeable than me provided snippets of information that guided me to this answer which worked for me.
Incidentally, it’s super important that you back up your data! A NAS (even a RAIDed NAS) is not a backup system. I have all my important videos backed up on YouTube, photos on Google Photos and music on Google Music. I also have the original DVDs/Blurays for the all movies in my Plex library, although it would be a pain to lose the work it took to capture them all.
Happy RAIDing!
Comments: